
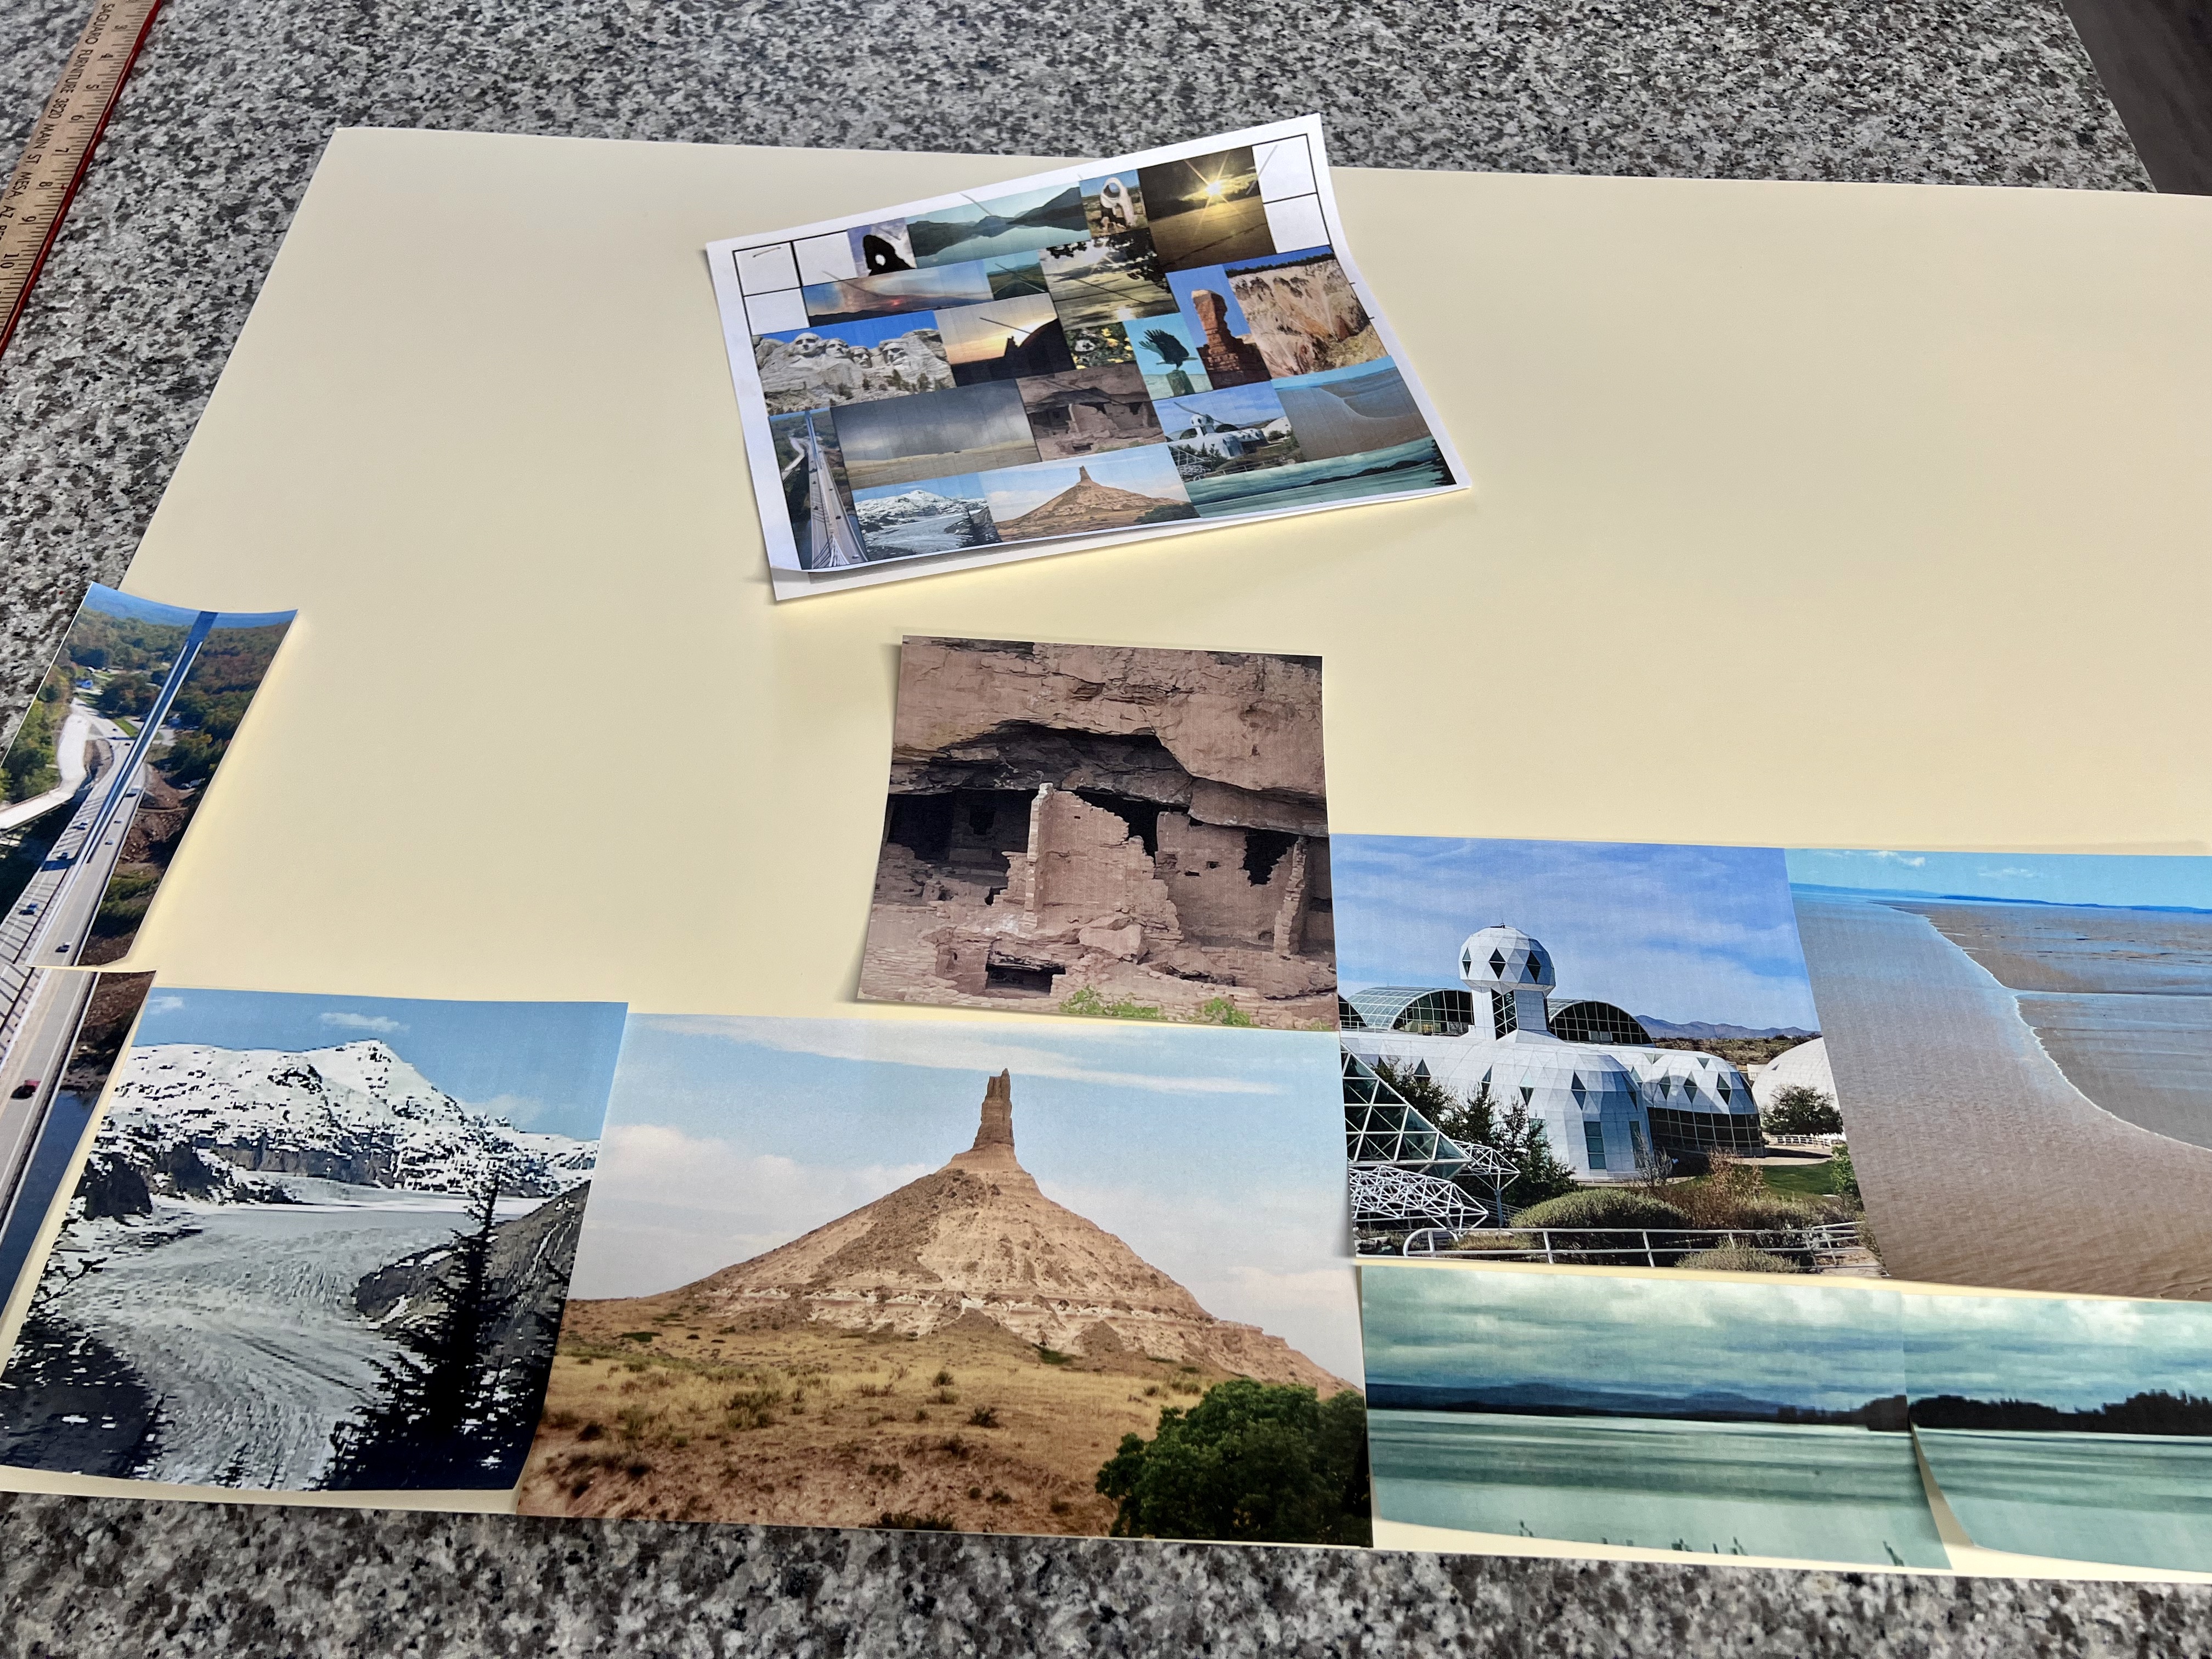
Things are quiet so I decided to make a new paper collage from
some of the photographs I've taken. To get started I created a grid
of 3 " x 3" squares on my computer and dropped the photos onto the grid.

Each photo was "cropped" to a certain size, based on the particular
photo, and placed on the grid on my computer so
I could determine which photos should be placed next to each other
based on their color. I did a small "mock-up" first.

Then I created a "to scale" layout for each category, based upon
the size... 3" x 3", 3" x 12, 6" x 6" or 3" x 9"
and then printed all the enlarged color photographs.

I found this great device, a Fiskars Card Making Bypass Paper Trimmer-9"
at the local Michaels store which would allow

me to cut each shape to a precise measurement.

Since some of the photos needed to be over 6" in one direction,
I had to use my 6" wooden ruler in addition to the paper cutter to
get those 9" x 6" sizes.

I did have some 3" x 12" shapes which meant
I had to cut that photo in two 3" x 6" pieces and then carefully glue
them together, as I did with this photo along the lower left edge.
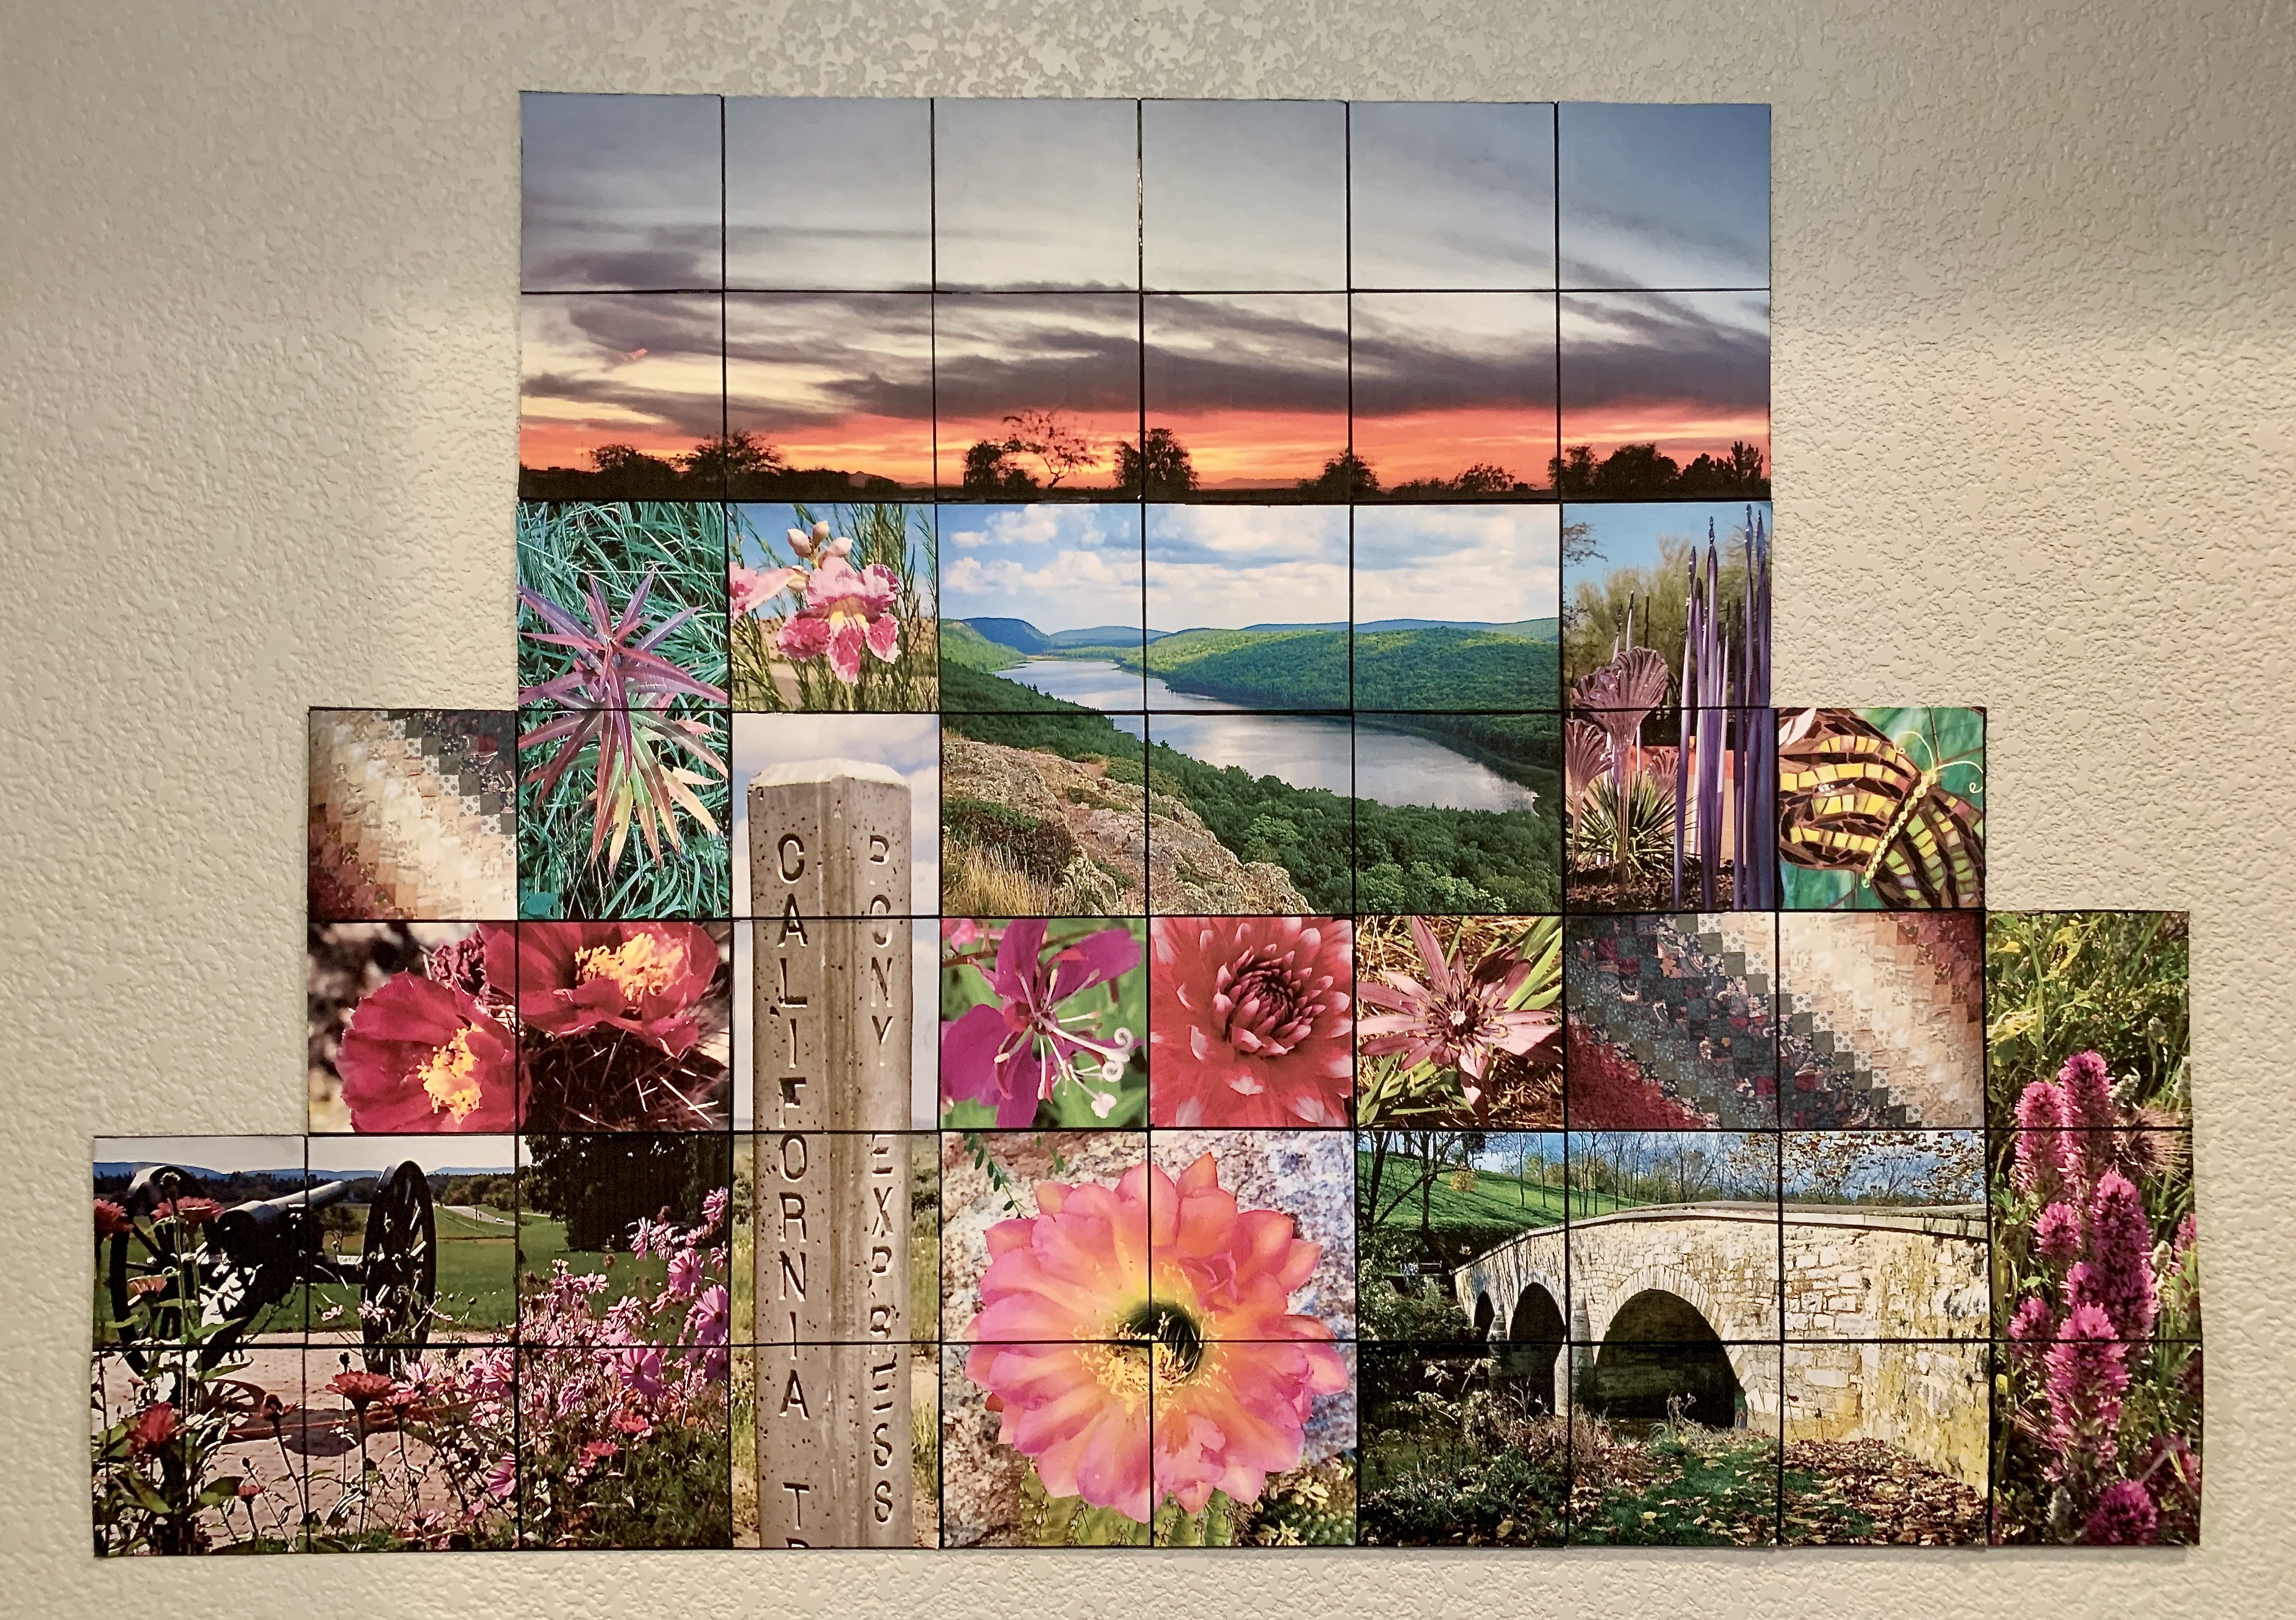
I'll tell a little story about this bridge:
Fort Knox Penobscot Narrows Bridge is located in
Prospect Maine I took this photo 9/23/2008.
This State Historic Site was constructed in the mid-1800’s.
It is the tallest bridge observatory in the world.
The elevator takes you up 420’ for a 360 degree view
of the Penobscot Bay area.
Prospect Maine I took this photo 9/23/2008.
This State Historic Site was constructed in the mid-1800’s.
It is the tallest bridge observatory in the world.
The elevator takes you up 420’ for a 360 degree view
of the Penobscot Bay area.
As you might imagine, each photo in this entire collage has it's
own story, but this blog would go on "adnauseam if I told you
all the stories!!!
Following my original to scale printout, I glued each photo
to a large piece of cream colored matte board, which

Don then trimmed to fit the actual shape of the
collage because, as you can see it has some irregular shapes
along the top edge.

To "frame" the piece, I applied some 1/4" Black Crepe Art Tape
around the entire 24" x 30" piece.

Then it was time to hang the piece on the wall space
between the master bathroom door and our walk in closet.
I used some tape to mark the placement of the lower corners,

and then attached Command Strips to all the corners as well
as the bottom & top edge.

Once again Don helped my with his level to make sure
it was level. Mission accomplished.

You know the story... for a closer
look click on any photo.

When we lived in AZ I made a similar collage.
However I cut any photo larger than 4" x 4" into separate shapes and
glued them on a black matte board and left a 1/4" space between
the photo segments,
so the black would show around each individual shape.
For example the sunset photo across the top
required that I print out 12 individual 4" x 4"
squares from my enlarged photo... which I also did on my computer.

It hung on the wall above the pull down murphy bed in
our second bedroom!!! We left it there when we left AZ...
Maybe it's time for a road trip to take some scenery shots
and get out of this 7 day over 100 degree heat wave.
Hey Don, I have an idea...


No comments:
Post a Comment