Thursday, February 17, 2022

Tiger Lily Applique/Quilted Banner


Tiger Lillies have a long history in our family and this
tells some of that story...


Tiger pacing at the Houston Zoo... no Lily!!!  (Sorry, couldn't resist selecting
this as I was going thru old photos.)


When we lived in Colfax,  I dug up a native baby tiger lily and planted
it in my garden.  


I had to protect it from the deer so I planted it close to the house
and  placed a 4' high "wire cage" around it and in return,
it faithfully bloomed every spring and lasted until fall for many years


When daughter Kristine got married in 1987 I asked her what she
wanted for a wedding present and she said, "You wove Eric (her brother)
a tapestry when he got married...


She was right.  Since Eric was living in Alaska I wove him this 5' x 6'
tapestry from a photo I had taken in AK in 1984.
It now resides in Eric's son's home in AK.


When Kristine was 6 or 7,  we discovered a field of wild tiger lilies
standing about 5 feet tall while hiking on the western slope
of the Sierra Nevada Mountains.  

 
So, we decided to take a break and laid down on the ground to watch 
them blowing in the breeze against a very clear blue sky.


This 4' x 5' tapestry was designed especially for her as
a special wedding gift.  And the saga of the Tiger Lily lives on.


The tapestry I wove for Kristine became the cover for
the book I wrote on tapestry weaving many years ago...
which is still in print today some 30 yers later.


So  I thought why not use a portion of the full tapestry as an inspiration
for one of my banners.  Since all the pieces are long and narrow, I selected 
the right hand portion of the tapestry and redesigned it, 


taking into consideration the limitations and restrictions of one medium 
(tapestry weaving) over the other (appliquéd quilting).


Once I created all the individual applique pieces, I did
a rough layout on a blue background before I stitched
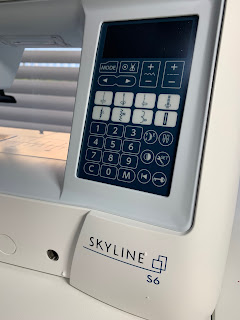
them all in place using the "blanket stitch" on my new sewing machine,
which I featured in the prior blog.


Remember to click on any picture for a closer view.
I'm already thinking:   "What will be next..."


Saturday, February 12, 2022

So Sew So


I had my prior sewing machine for 28 years

 When I purchased it in 1994,  I paid $2400 for it.  It was a leader 

in it’s day and served me well.


My new machine is much better than so, so!!!  

Introducing Janome Skyline S6.

 Based upon the prior statistics this will be my last sewing machine… 

and it cost us less than the old one... $1699.99 on sale (15% off).   


And it does way more…everything you can ever imagine or dream 

of, self threading of the needle, start and stop options by foot, 

knee or just touching the start stop button on the front.  

Fortunately there are many similarities between the old machine and the 

new one since the old one was also a Janome.


I am working my way thru the 92 page manual and the DVD, trying to 

understand the sequence of steps to use the features of which

there are many.


For example there are 6 different “modes” of operation + 100 pre-programmed 

pattern stitches  + 250 special letters & characters for monogramming,

all featured on the lift up top!!!


And the can all be controlled by the touch screen.  

Just select the # of the “stitch” you want and then adjust it, making the

 stitch width & length precisely the size you want, etc., etc., etc!!!


And the  front storage compartment keeps your favorite, tools, 

feet and a few bobbins easily accessible at the front of the machine.


It lives in the spare bedroom and when I open the blind
behind it, I don't even need any additional light and
enjoy sewing by the natural light that floods this room.


And this is a teaser close-up of my first project on the new machine. 
There's more to the “Tiger Lily” story 
will be featured in an upcoming blog of its own!


Friday, February 4, 2022

Feb 2022 - Appliqué Heart Wall Banner


Yes, you're right this is not a "Heart", but I wanted to share the
completed Parrot wall banner that I explained in the last post.  It is
 hanging near the front door where I will rotate the series of wall
banners I'm going to make... one for each month.


My quilter friend Julie shared information about this neat
hanging apparatus which was the perfect solution.  The rod can
extend so if I make a banner a little wider or narrower,  it will still 
fit on this narrow wall space... 


Once again I spread out on the kitchen counter.  My
new cutting mat is 2 x 3 feet which gives me lots of space
to work.


I usually work out my design on my computer which is attached
to a 27" monitor so I have a lot of area to move things around
too determine the proper placement.  I often take photos of the
design elements (pretty basic here) so I can move the individual
shapes around.


Then it's time to  determine the size of the piece, 
calculate the amount of yardage needed for all color areas and head
to the local fabric store.  This is my color palette. 


I selected a wild background, don't you think?  Of course I wanted
to work in shades of red for the hearts.  So I cut out a variety
of sizes and fused them to the background piece of fabric. 


Then I like to use the  blanket stitch to secure the appliqué shapes.
I selected a dark burgundy red thread for the hearts
The process is referred to as raw edge applique, which means
you don't have to turn under any edges.


Then after layering the background fabric (with appliqué shapes attached),
on top of the batting material, I placed all that on the wrong side
of the backing material. 


Next I quilted all 3 layers together with a black thread.
(remember to click on any photo for more detail)


Then the edges of the background fabric are folded around to the front 
of the piece to create the edging border.


FYI I selected this "apple" fabric for the backing, not because
they looked anything like hearts, but the color was just
right, and it's always all about the color.   And it would only
look like random shades of reds & black in the 1/2" border.
(See photo above).


Don's reaction "wild".   Speaking of wild,


I'm already thinking about the next project... a wildflower
banner, maybe featuring one of my favorites, the Tiger Lily...
Stay tuned!!!


Another Mixed Bag: Ruby + Flowers and other things...

Can you believe this weather for the Sacramento CA area in late JUNE???  Time to head outside. There were interesting vapor trails in a beau...